
I frequently refer to “blending tools” in my posts. Blending tools are one of my favorite tools, and I can barely function creatively without them! Yet some people may not be familiar with blending tools, what they are, and how they work. So I thought I’d dedicate a post to the subject.
Originally, I purchased Ranger’s blending tool (marketed under the brand “Inkssentials”):
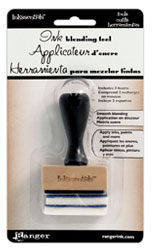
The blending tool consists of a handle connected to a wood block to which Velcro is attached. Foam pads (sold separately by Ranger/Inkssentials) stick to the Velcro, allowing you to change the pad when it wears out. I liked the basic design and size of Ranger’s blending tool, but I didn’t like the handle. I never held it by the handle — I held it by the wood block. So the handle got in my way and made both labeling and storage difficult.
So I created my own blending tools without the handle.

My blending tools are the same size an shape as Ranger’s, and they use the same foam pads — but with the handle out of the way, I can label them properly and store them in a much more compact space.
Originally, I made eight blending tools: one for each primary and secondary colour plus brown and black. That worked fine until I started teaching a lot of classes where I needed a blending tool for each of the 48 Distress Ink Pad colours. Although I think a set of 8 would work fine for most crafters, I now have 48 blending tools — one for each ink pad colour.
My boxed sets (pictured above) sell for $40 and come with 8 blending tools — with foam pads — labeled on 3 sides with laminated colour label so users can tell which tool to use for which colours of ink. Contact me if you’re interested in purchasing a set. They are easy to store, and very well built. (I accidentally ran one through the washing machine and dryer once, and although I don’t recommend that, I’m happy to report that the blending tool survived the ordeal beautifully! The laminated labels and foam pad were still attached, in spite of the water and heat. So they’re built to last!)
Whether you use the Ranger blending tool, mine, or your own version, they are an incredible tool for creating soft colour blends that look almost airbrushed in quality. They work beautifully for edging cards and other papercrafting projects, and can also be used for creating custom colour tints of printed craft papers. No matter what project I’m working on, I almost always reach for my blending tools because they are truly a staple for me.

Janni, I was interested in your blending tools, but I also find that large wedge-shaped cosmetic sponges come in very useful as bending tools An added advantage of these is that they provide a variety of corners and shapes and can also be used as stamps.
Hi Kate, I tried the cosmetic sponges too — and you’re right, they give sharp corners (which can be nice at times), but normally, I prefer the softer, blended look (almost like an airbrush) that I can achieve using the blending tools. The trick seems to be to lift the front edge so I blend off the back edge (and can see what I’m doing with the front edge lifted).